Birfield Repack
The fun of Toyota Birfield joints - repacking with grease.
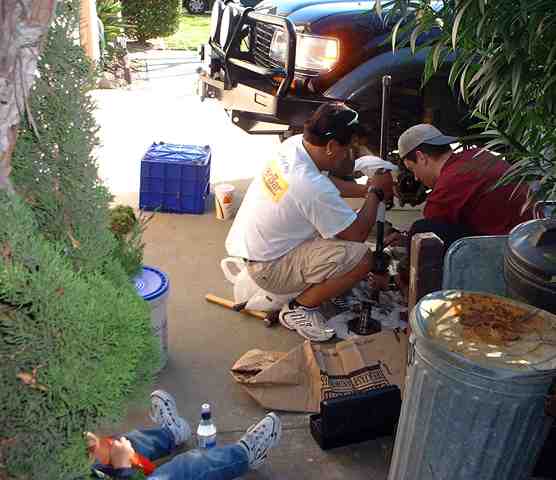
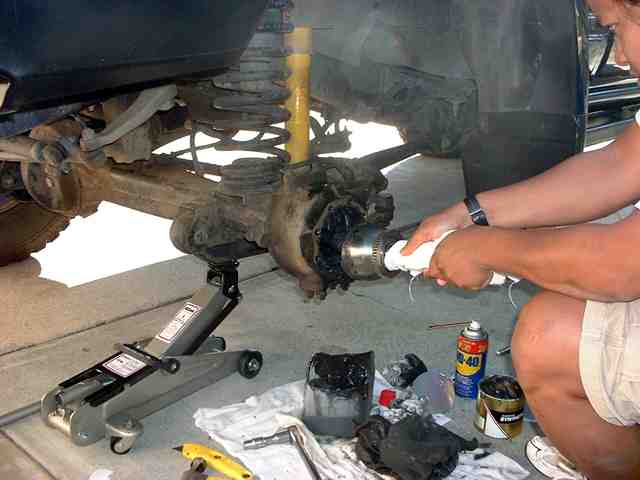
Time for Manuel to repack his birfields. The long axle is out and fresh grease is being pushed into the joint after cleaning out the old - you did clean out the old right?
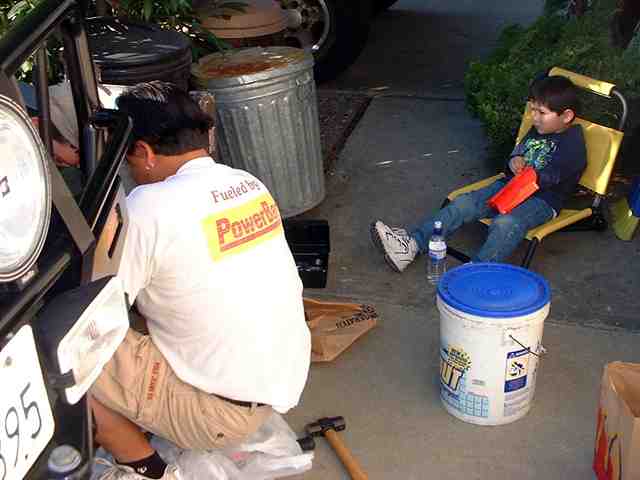
The best seat in the house ;-) My son is overseeing the work - he certainly has a serious eye on the job.
Oh what fun - lots of diapers on hand makes an otherwise messy job less messy (for the ground at least). The stub axle is in the foreground of the picture.
You can see the mess of goop in the milk container under the knuckle. Manuel is definitely having fun here ;-). Yes, there is a jack stand under the chassis.
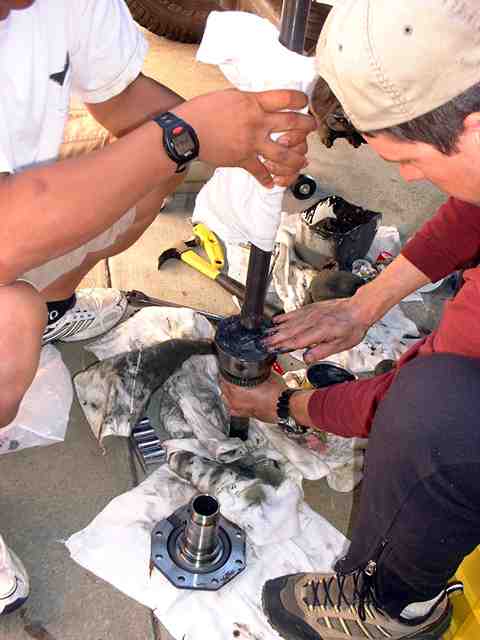
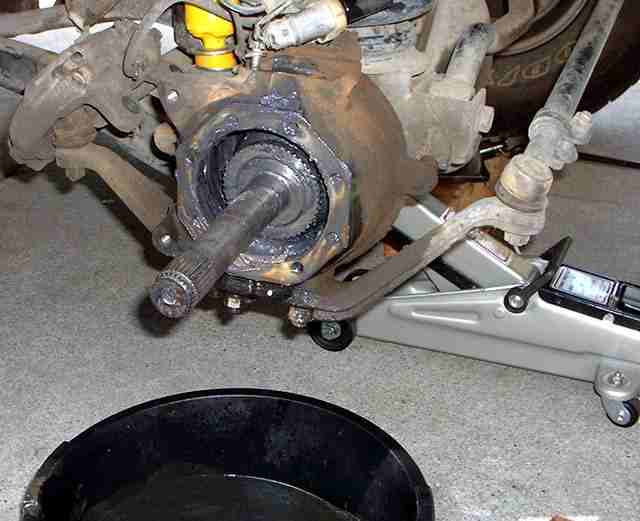
Amando is using his magic touch to push the long axle back in. There's a spot in there somewhere that the axle will be happy. You can see the teeth on the birfield end that the ABS sensor uses to determine wheel speed. Remember to pull the ABS sensor out (held by one bolt on the top of the knuckle) or you will damage it if you try and yank the axle out first. Also, have the wheels pointing straight ahead - this lets you get the birfield out of the knuckle.
Basically you need a few cans of molybdenum disulphide (lithium base) grease for everything Except the bearings. For the bearings use general purpose high temperature bearing grease (lithium base).
Well, it was time to do my own 80's birfields - this time I took some extra pictures so as to be better able to document the procedure. Below are the Toyota part numbers and the price I paid - these are the parts that you need at the very least. There are also a few gaskets that may need replacing if damaged.
2 x 90311-62001 Oil seal $7.94 each (this is the grease seal in the hub)
2 x 90310-35010 Oil seal $4.14 each (this is the oil seal in the axle tube)
2 x 90215-42025 washer $1.27 each (lock washer for stub axle nuts)
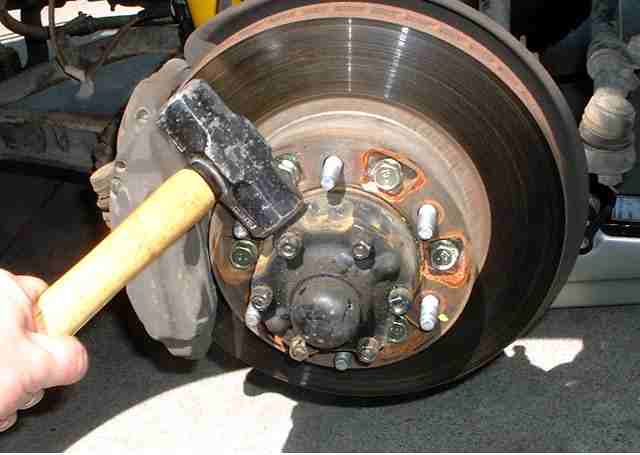
Below can be seen the easiest way to loosen the cone washers. Loosen the nuts, but leave them on so the cone washers don't shoot into orbit when they finally 'pop' out. A few careful strikes (hard hits) with a hammer is usually sufficient to pop one of the cone washers free, if not try a different one. Once one pops out the rest will pop out fairly quickly.
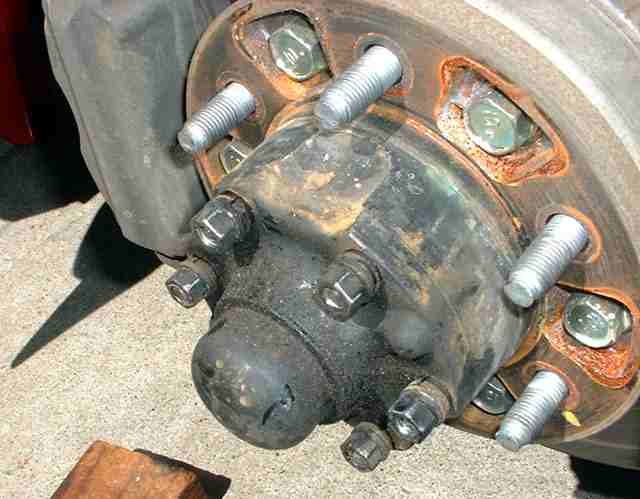
Success, all the cone washers have popped out. The dust seal is still on, it should be removed prior to removing the cone nuts and washers since there is a large circlip on the axle end that will prevent the drive flange from coming off. The dust seal is removed by using a sharp screwdriver to prise it off the drive flange. Once removed, the circlip needs to be taken off the axle end - make sure it doesn't pop off into the never never...
This picture shows how easy it is to replace the brake pads - remove a spring that retains the two pins. There is also an anti-rattle clip that has already been removed (it clips onto the two pins between the pads). Once the pins have been removed, the pads and their shims just slide out. Two bolts retain the caliper and need to be removed to free the caliper from the rotor.

The brake caliper has been removed and hung over the tierod. The flange has also been removed. The next step is to straighten the lock washer and remove the lock nut. Then the lock washer can be removed along with the nut and washer that preloads the outer bearing.
The next step is to pull off the hub and rotor - a firm yank might be necessary. We are nearly into the knuckle assembly. We just need to remove the 8 bolts that hold the dust shields and the stub axle in place.
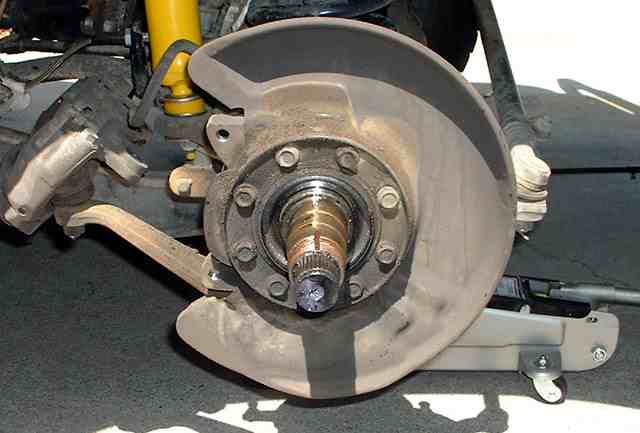
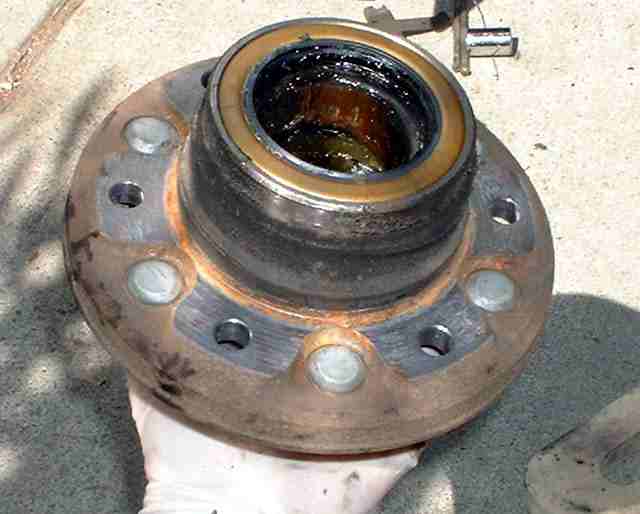
The following is a picture of the hub after removing it from the rotor. If you are reusing the original rotor, put an alignment mark on the hub and rotor to ensure they are re-assembled in the same orientation. The next step in the process is to remove the grease seal - just secure the hub in a vise and use a screwdriver and hammer to remove (destroy...) the grease seal. Once done the bearing can be removed, the entire hub and bearing washed out and new grease packed into the bearing and hub. A new grease seal is then pushed back in - a flat piece of wood and hammer can be used to carefully drive the new grease seal into place.
Once the dust shield and spindle are removed we finally have access to the axle itself. Prior to pulling out the axle, the ABS sensor MUST be removed or you WILL damage it! The picture shows the sensor about to be removed. Just remove the bolt and pull the sensor out.
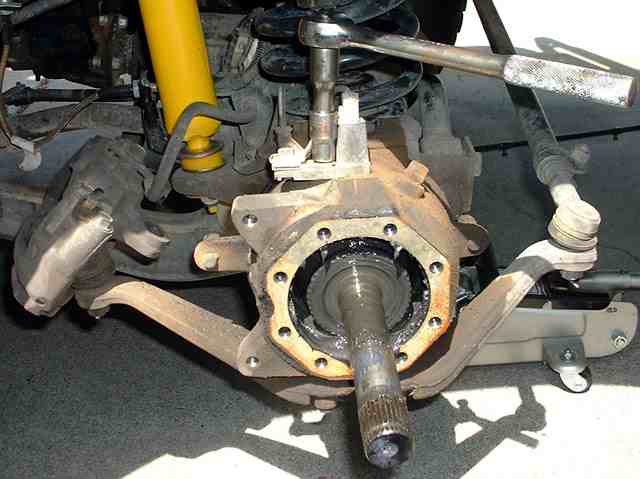
The sensor has been pulled out and the axle can now be safely pulled out. Note, the steering MUST be in the straight ahead position and the flats on the birfield must be in the vertical plane. If you jack the other tyre just off the ground, you can easily rotate the axle until it is in the right position to pull it out.
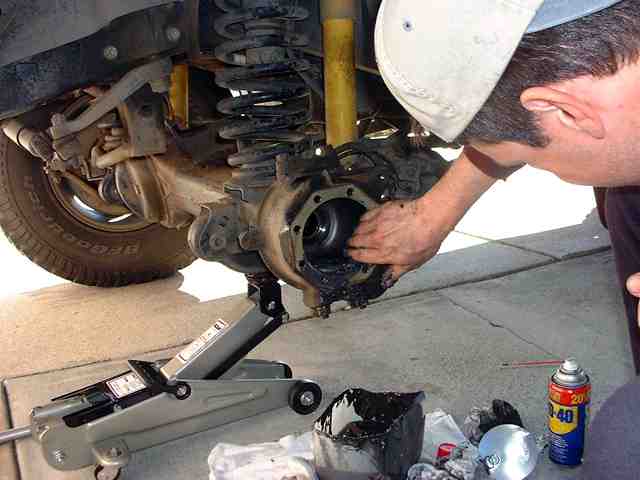
Oooh - lovely mess of oil and grease. Once the axle was drawn out, oil from the axle housing started dripping into the knuckle. You can see what a mess expects you if you have a leaking oil seal.
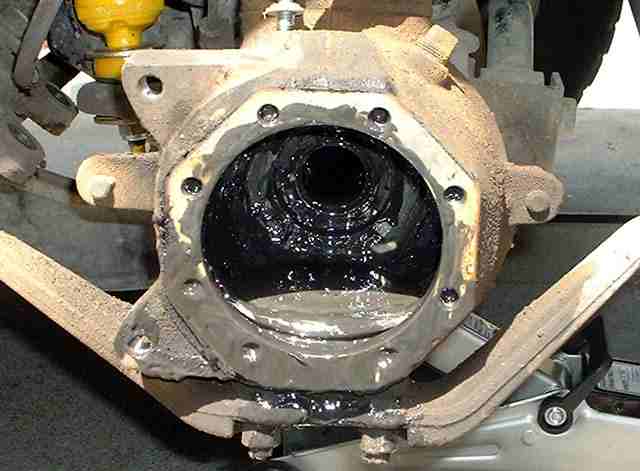
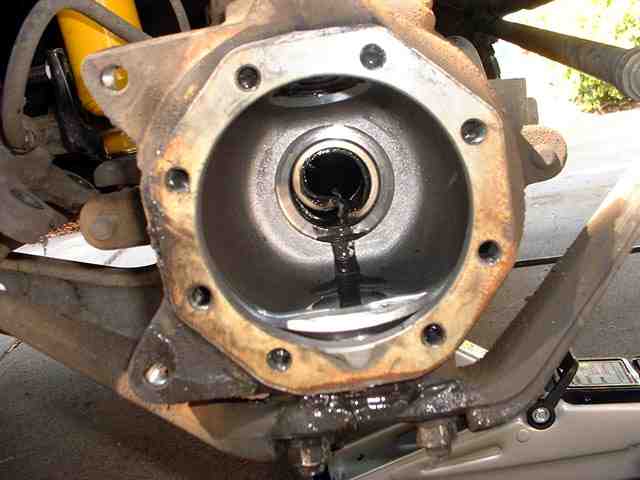
The axle has been pulled out. Its a good idea after having done this much work to replace the oil seal. The oil seal is the device that keeps the oil inside the differential housing and axle tube from mixing with the grease in the knuckle (a bad thing!). If you have oil leaking into the knuckle it is likely that you will have oil dripping out on the back of the knuckle and the oil will start washing grease out of the birfield joint (another bad thing). You can see from the photo that the knuckle has all been cleaned out in preparation for being repacked with new grease. The easiest way to remove the oil seal is to use a sharp flat screwdriver and a hammer to bend the edge in. The screwdriver can then be rotated and the side of the oil seal will collapse and the oil seal will just pop out. You can see this has been done below and the seal will now just pull out. Once out the oil will start leaking into the knuckle again - just jack that side of the vehicle up a bit. Also, prior to removing the oil seal, reach in with your finger tip and pull out the spring that is on inside rear of the inner lip - to prevent the possibility of it falling into the axle tube.
A brand new oil seal has been pushed back into place - to do that you need an oil seal tool.
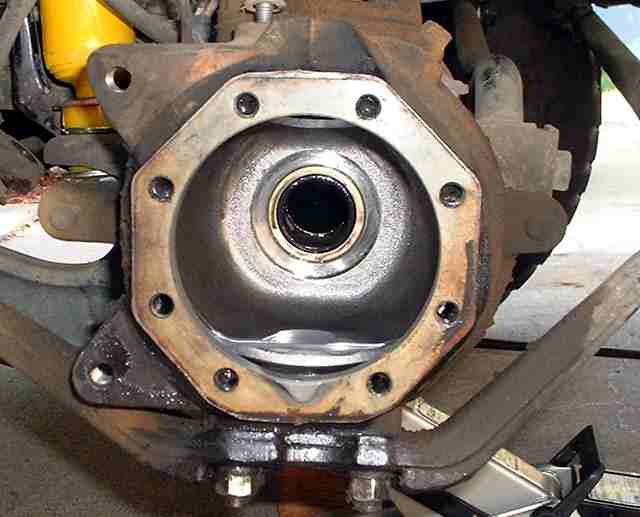
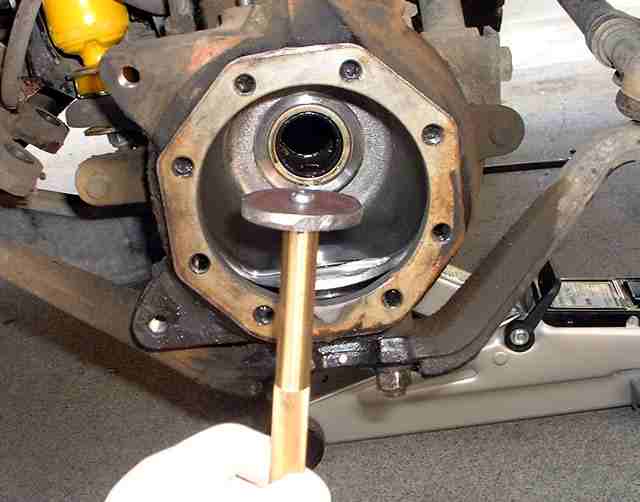
A picture of my home made tool (too lazy to have bought one). I just cut out a metal disk the same diameter as the outer edge of the oil seal and bolted it to the end of a brass drift. Then it's a simple matter of hammering in the new oil seal, carefully. When packing the knuckle with new grease make sure to wipe some onto the oil seal lip - this will ensure that the axle will slide in without damaging the lip of the new seal.
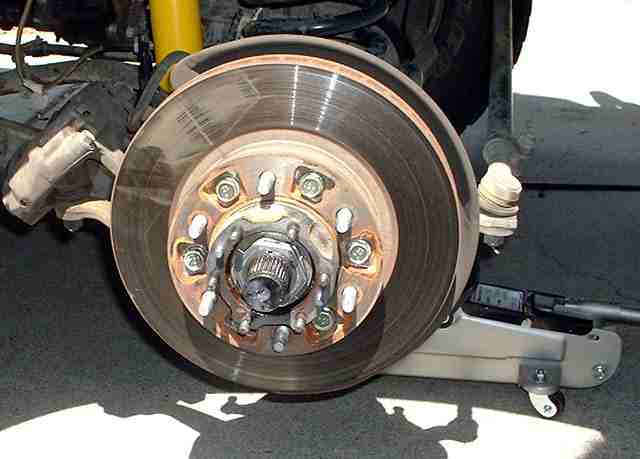
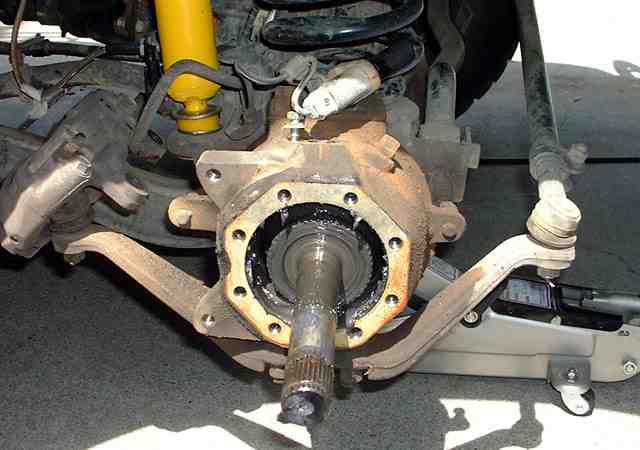
The axle has been pushed back into position, after washing out the birfield and repacking with new grease. The knuckle will be packed with some more grease and then all the steps are followed in reverse order. Follow the maintenance manual for all the torque figures and the procedure for setting the necessary bearing preload.
Job all done - factor about 4 hours per side to do the job right. Of course if you need to change bearings/races, it'll take quite a bit longer....
![]()