80 Series Snorkel
The following page shows the installation steps for the Safari Snorkel (old style) - with some updated info for the new style.
The snorkel is a nice addition to provide cleaner air to the engine - it also looks good ;-)
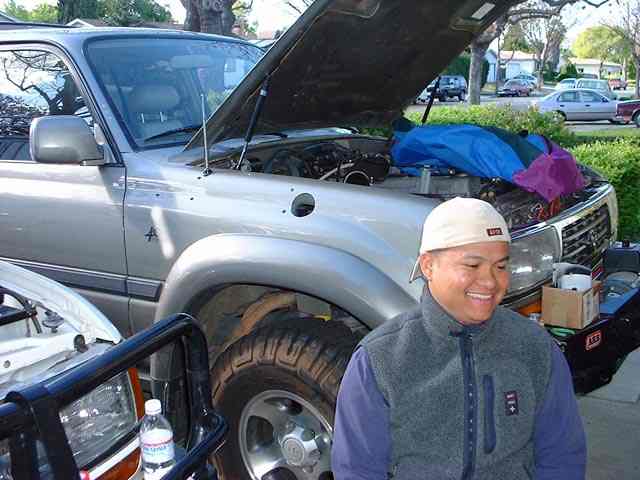
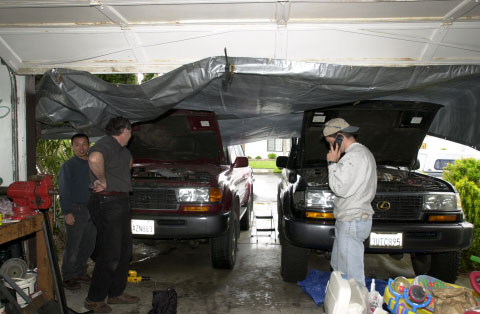
The 'great snorkel' installation started with 5 guys doing a group buy - we installed two on a Saturday afternoon and three on the Sunday afternoon (with the rain gods actively hindering us).
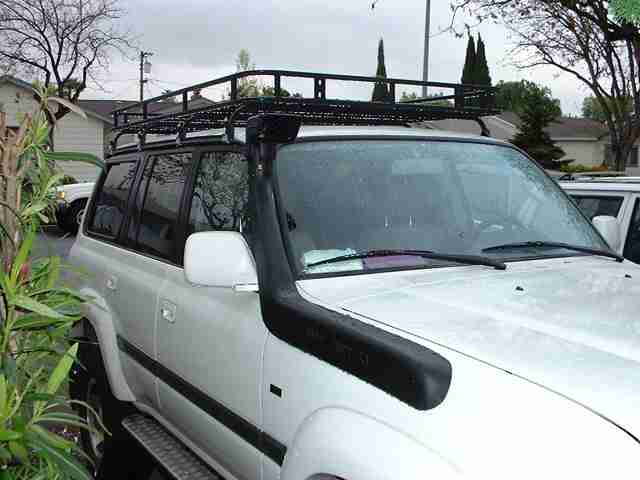
The following is a picture of the installed snorkel - black certainly looks good against the definitive white body!
Some basic tips after 5 installations worth of experience:
Trust the template for the big hole only (3 1/4" Hole saw - deburr and file a bit larger to not bind). The new style snorkel requires a 3 1/2" Hole saw!
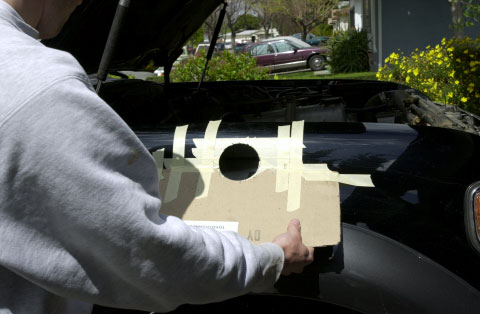
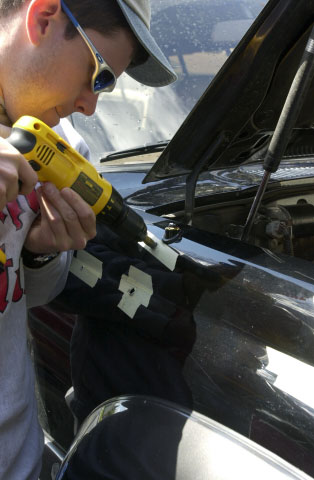
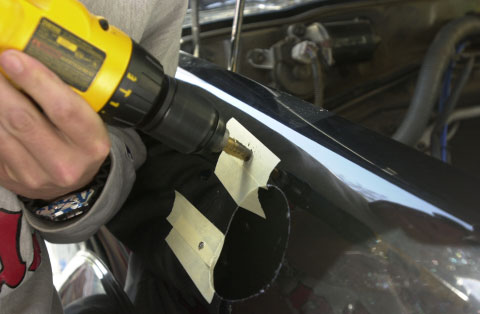
Use a spring loaded center punch to mark all holes prior to drilling - this will prevent the drill bit from skating on the body. Also, apply masking tape on/around every hole you will drill.
Use a good quality hole saw and a reasonably powerful 1/2" electric drill. Remove the airfilter assembly completely, three bolts attach it to the fender. Remove the lid, undo the hose clamp that connects the mass air flow sensor to the air inlet manifold hose. Remove the airbox 'stuff' from inside the fender, three nuts on the inside of the fender hold it all together - it comes out as two pieces (place in rubbish/trash bin). Using the template, drill a pilot hole for the hole saw. Then use masking tape & cardboard to protect the body. Engage the hole saw on the top & bottom of the fender if possible - grip the drill SECURELY - keep the speed up (1/2 to 2/3 speed on my DeWalt 1/2" drill) and try to not stall the drill, if it slows down apply 'more power' - if it stalls it WILL try and kick back - pull the hole saw back away from the body, get it back up to speed and then re-engage the metal.
You DON'T need to do this for the new style snorkel! AFTER the big hole, you need to heat and press in the snorkel around the US antenna - so the snorkel can fit right against the body. To do this, mark the position that needs to be pressed in. Then using a torch, slowly heat the plastic and using a 1" diameter (or similar) pipe press the plastic. Go slow and try to not melt a hole in the snorkel (as happened to one of ours - epoxy resin to the rescue). You will need to press in the plastic about 1/2" or so - refit as necessary till you get it right. Try to keep the heat only on the back side - otherwise it will smooth the plastic texturing.
Don't trust the template for the other holes too much - the template stud holes are 'nearly' correct. The way we chose to get it right was to drill the big hole and then with the template taped down fit the snorkel (with fresh paint around the stud holes on the snorkel) - press against the template to determine actual hole positions. You may be tempted to install the studs and then fit the snorkel against the body and use the stud positions on the body to drill the holes - this is NOT accurate since the snorkel slides into the big hole at an angle , i.e. the stud holes you measure this way will be a bit higher than they should be. The best method would be to have short dummy studs that would screw in and protrude only 1mm or so with a dab of paint on each one to mark the right spots.
Use a step drill to do all the stud holes on the fender - nice clean holes. We drilled 1/2" holes or a little less - the studs are 8mm diameter - Safari recommends 16mm holes - probably to speed up shop installation time. We preferred to do the job 'right'.
Paint all drilled holes - you don't want the metal rusting - touch up paint works well and dries fast.
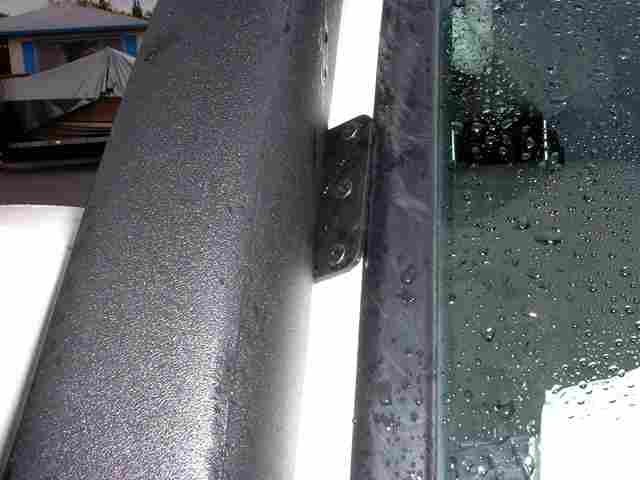
Install the studs into the snorkel and install the A pillar bracket onto the snorkel. With the snorkel fitted against the body in it's final (hopefully correct position...) mark the A pillar bracket outline on the pillar. Remove the bracket from the snorkel (and the snorkel) - position the bracket on the A pillar and mark the three mounting holes. We used Rivnuts instead of the stupid Safari plastic inserts. The top two holes are easy, the bottom hole can be an issue. There is an inside metal skin behind the lowest hole - if your bracket locates such that it's edge is close or right on the windscreen rubber surround then you will have clearance to fit a Rivnut in the lower hole. If instead the bracket is away from the rubber such that the holes would be in the center or towards the outside of the A pillar then you will have very little room - not enough for a Rivnut - on one install we ended up plugging the bottom hole, on another we didn't even drill the hole. 2 Rivnuts will be a lot more secure than the original Safari plastic inserts - even double sided tape would be ;-)
Use some adhesive (we used liquid tape) on the large backing washers (for the studs) inside the fender to prevent the washers falling off into no man's land. The stud at the top, behind the antenna is the hardest one - removing the antenna is one option - undo the nut where the antenna extends out of the body and one bolt on the inside fender to release the antenna assembly. Either way getting to the far studs is a challenge - long skinny arms are an advantage! On the new snorkel the stud right next to the antenna is no longer there, but their are 2 studs further back towards the door - even longer arms are useful here ;-)
To tighten the hose clamp on the rubber pipe that mates to the snorkel (inside the fender) - remove the one screw that holds on the USPS amber indicator (screw is accessible from above and screws into the light assembly) - then just pull the indicator straight forward and it will just slide out. Now you can get into the fender with a nut driver to tighten the hose clamp.
We did two snorkels on a Saturday afternoon, started at 1:30pm and finished at 7pm. We did three the next day, started at 1pm and finished two by 5pm and the 3rd by 7:30pm - fighting the rain most of the afternoon. The Safari instructions claim 70 minutes install time - don't plan on it! I think 3 hours is probably a better estimate, mainly because you WILL measure and re-measure and fit and refit many times before you are happy. I'm sure 70 minutes is 'feasible' if you are working on someone else's 4wd - not your own!
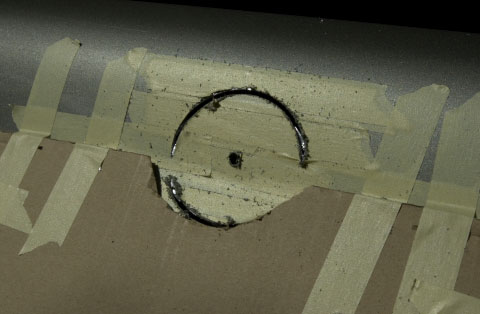
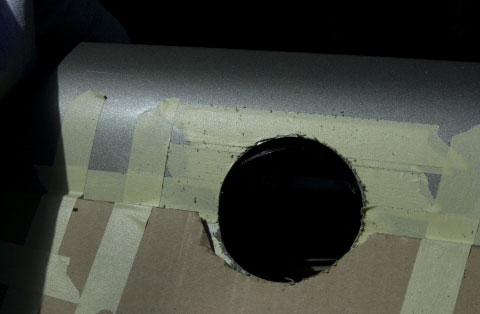
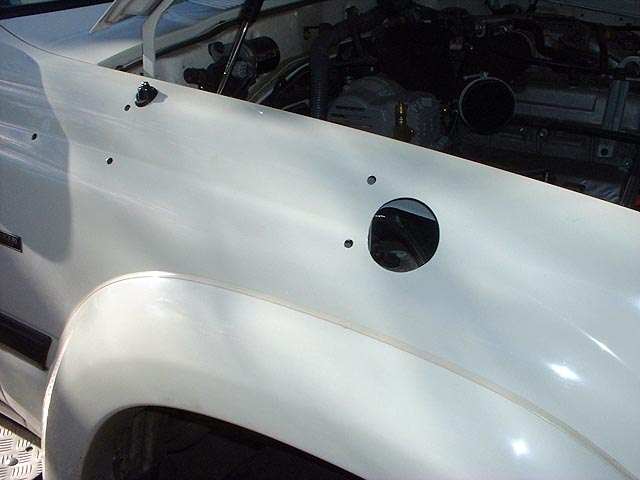
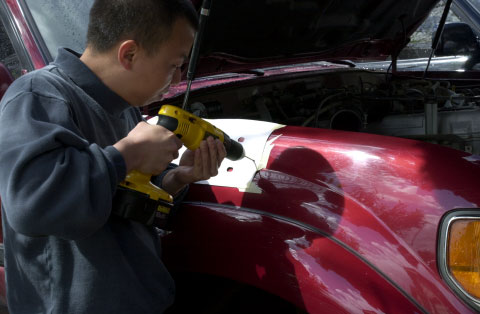
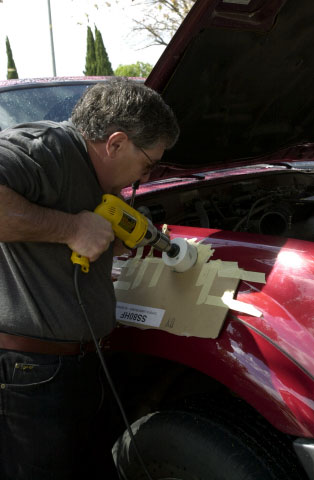
The guinea pig for the first big hole was Amando's 80. I was happy to volunteer to drill the hole - I was next up... The left picture shows the progress - I was tentative at first - the others were pretty well drilled in one shot. Note the masking tape and cardboard - I had been informed that if the hole saw kicks back it tends to go for the flare. The right picture shows the finished damage - a perfect hole. For the new style snorkel the center hole (seen below) will be about 3/4" lower - i.e. it is below the crease in the fender.
Phil looks happy drilling into Amando's 80 - what a sick man! I didn't notice him smiling when he was drilling into his though ;-)
The next picture is Amando showing happiness that all the damage to his 80 is now complete - note he is sitting, i.e. he is taller than 4'. Notice his 'modified' ARB roobar - the jury is still out regarding the thought process that was required to come to the decision to hack off the top part.
A similar set of holes drilled into my 80 after application of touch up paint.
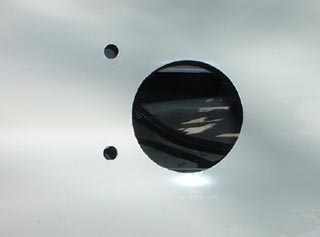
The complete set of fender holes in my 80. Looks very nice - no huge gouges into the side of the fender!
Sunday saw the drilling of the remaining three 80's. Manuel's was the first one on the block - he is assessing how well I drilled his hole. At this point I am considered the 'master' driller for the big hole - the odds are now in my favour that I may know what I'm doing ;-)
Step drill works really well for opening out the stud holes - no risk of any sheet metal distortion. A step drill is the correct way to drill bigger holes in thin metal. We drilled 1/8" pilot holes first and then used the step drill to open them up. Notice Manuel wearing his high performance safety goggles ;-)
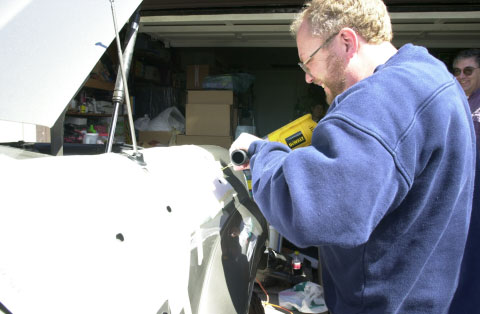
Left picture shows me heating the area that requires to be pressed in to fit the USPS antenna. The right picture shows the wrong way - the last snorkel and Phil manages to melt a small hole into it - epoxy resin to the rescue... Manuel looks on with relief knowing that his is already installed ;-) This step is not required for the new style snorkel since Safari has changed the design to totally clear the US antenna.
Did I mention it was wet on Sunday? A large tarp came to the rescue and allowed us to continue working. Though it doesn't appear that we actually are doing any work...
David drilling the pilot hole into his 80 in preparation for the 'master' ;-)
Time for David's 80 - I'm getting good at this now. Of course the odds of me screwing up are also increasing... But my luck continued and another perfect hole was drilled.
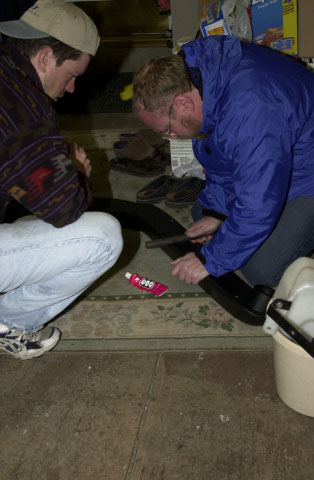
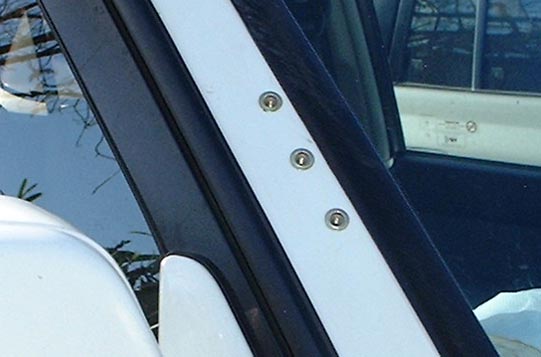
The installed 10x32 Rivnuts in my pillar. Definitely better than Safari's little plastic squares. We did manage to break a part of the installation tool when doing Amando's (he broke it!) - but fortunately Phil had an alternative tool that we then used to do the rest.
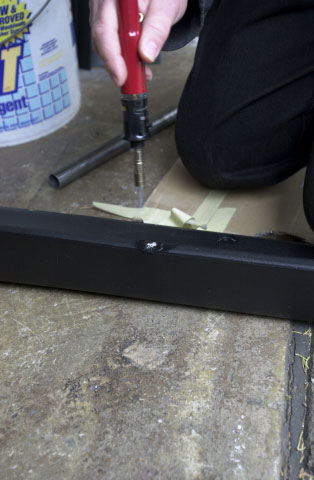
A picture of the pillar bracket. We used 10x32 1/2" long black plated hex drive screws. We drilled out the original holes in the bracket to the correct diameter and then ran a countersinking bit to prep the holes.
![]()